
Published October 31, 2026
What Mold on Your Exterior Really Means
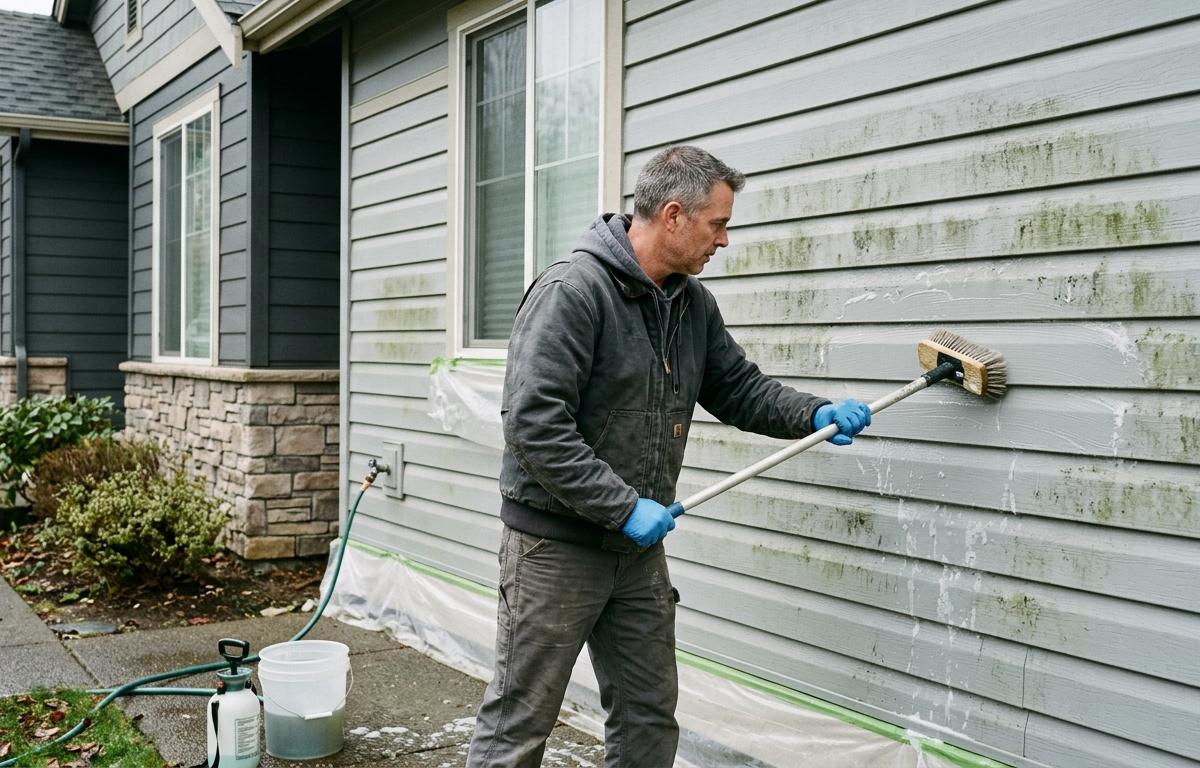
Before you learn how to kill mold on house exterior walls, it helps to know what you're looking at. The dark streaks, green film or fuzzy gray patches on a north-facing wall are usually mold, mildew or algae, and in Everett and the rest of Snohomish County they show up fast. Shade, cool temperatures and long wet seasons give them everything they want. They collect under eaves, behind shrubs, along the bottom courses of siding and anywhere a gutter has been overflowing.
The surface growth is rarely the whole story, so learning how to kill mold on house exterior surfaces takes more than a quick wipe. As Today's Homeowner puts it, getting rid of mold and mildew on the outside of your home means you have to kill it and remove the spores. Wipe off the stain without killing what's underneath and it comes back in a season or two. Left alone, moisture-loving growth can also cause wood to deteriorate and rot, so this is more than a cosmetic problem.
What the wall is made of matters too. Vinyl and painted fiber cement are nonporous, so growth sits on top and responds well to a good wash. Bare or weathered wood, stucco and masonry are porous, and growth can work its way in. That difference drives which cleaner you choose.
Finally, think about the repaint. If you plan to paint, killing mold isn't a stand-alone chore. It's the first stage of surface preparation. What you find once the surface is clean, whether sound wood, soft wood or peeling old paint, determines how much more prep the job needs. We'll come back to that.
Safety Gear, Cleaners and the Dilution Question
Protect yourself first when you figure out how to kill mold on house exterior siding. Wear splash goggles, long sleeves, chemical-resistant gloves and an N-95 respirator, which Home Depot's mold guide recommends to limit how much mold you breathe in. Work outdoors in open air. Never mix bleach with ammonia or other cleaners, and keep kids and pets away until everything is rinsed. Cover or wet down nearby plants, and keep runoff away from storm drains.
Choose your cleaner by surface. Bleach solutions are typically suggested for nonporous surfaces such as vinyl siding. On porous wood or masonry, an anti-microbial cleaning product is the better call, and you follow the label's contact time. A mild detergent or TSP substitute helps lift grime either way.
The dilution question is where published advice gets messy. Reputable sources don't agree. One Today's Homeowner page gives 1 part bleach to 10 parts water, another gives 1 quart bleach to 3 quarts water with a little detergent, and HomeAdvisor suggests 1 part bleach to 4 parts water. Rather than pretend there's one magic number, treat these as a range. A weaker mix is gentler on plants, paint and wood. A stronger mix kills faster but raises the risk of damage and runoff trouble.
So start weak and test. Mix a small batch at the milder end, apply it to a hidden patch of the same material, wait out the dwell time and see whether the growth lifts. Step up only if it doesn't. Whatever you choose, read the label on any bleach or cleaner you buy and follow it over any blog, this one included. Some of what circulates online, like the claim that the CDC advises against bleach for mold without protective gear, comes through secondary sources. If that detail matters to you, check the agency's own page.
Step-by-Step: Kill, Scrub, Rinse and Dry
Gather your protective gear, a garden sprayer, a soft-bristle or long-handled scrub brush, your chosen cleaner, a hose, a ladder you trust and a few tarps for plants and walkways. Knowing how to kill mold on house exterior walls starts with having these ready. Pick a dry, mild day when the wall won't bake the solution dry too quickly.
Step 1: Prepare the area
Move planters, furniture and decor away from the wall. Cover shrubs with plastic or wet them thoroughly so they absorb less runoff. Close windows and doors, and shut off outdoor outlets near your work area. Brush off loose dirt, cobwebs and leaf litter so the cleaner reaches the growth itself.
Step 2: Test a small patch
Apply your mildest mix to an inconspicuous spot and wait the full dwell time. Check that it kills the growth without discoloring the paint or raising the wood grain. Two minutes of testing can save you a lot of regret.
Step 3: Apply the cleaner
Spray from the bottom up so the solution doesn't streak down a dry wall, then go back over the area top to bottom. Work in manageable sections. Bleach solutions are typically left on for 10 to 20 minutes, according to Today's Homeowner, while anti-microbial products follow their label. Keep the surface wet during that window. If it starts to dry, mist it again.
Step 4: Scrub
Use a soft brush and work with the grain of the siding. Heavy growth in lap joints and trim corners usually needs a second pass. Don't gouge soft wood, and don't take a wire brush to siding or trim.
Step 5: Rinse thoroughly
Rinse with plenty of clean water, again from the top down, until no residue or foam remains. Rinse the plants and ground too. A garden hose is usually enough. If you use a pressure washer, stay on a low setting and keep the tip moving, because forcing water behind siding creates a moisture problem instead of solving one.
Step 6: Inspect and repeat if needed
Let the wall dry a bit and look closely. Dark residue that's still there means the growth is either still alive or the stain has soaked in. Repeat the treatment on those spots rather than assuming one pass did it. This also answers a common question: pressure washing alone can remove growth but doesn't reliably kill it, which is why the cleaner step matters.
Waiting Before Paint and Checking the Surface
The most common mistake after you learn how to kill mold on house exterior walls is painting too soon. Paint over a damp or still-contaminated surface and you trap moisture and spores under the film, which is exactly the setup for peeling, blistering and a repeat outbreak.
Give the wall time to dry fully. In dry weather, surfaces may be ready in a day or two, but in a typical Pacific Northwest shoulder season, shaded north and west walls can stay damp much longer. Don't go by the calendar. Go by the wall. Look for patches that stay darker than the surrounding area, press a hand against shaded sections to feel for coolness or dampness, and check the bottom courses, trim joints and the areas under window sills, where water lingers. A moisture meter on wood siding takes the guesswork out, and the paint manufacturer's label lists the acceptable moisture and temperature conditions for the product you plan to use.
Next, check the surface itself. Run a hand over it. It should feel clean, not chalky or slimy. Probe the wood with a screwdriver tip near joints and along the lower edges. Soft, punky wood means rot, and that needs repair or replacement before any coating goes on. Look for flaking paint, bare wood and open caulk lines, since those are where the next round of moisture will get in.
Here's where mold cleaning meets the PCA P14 prep levels. The standard defines four levels of surface preparation, and Level 2 is the most common choice for an exterior repaint on an older building, because it prioritizes longevity. Once the cleaned wall is dry, what you find decides whether Level 2 is enough or the job needs more. The standard also treats severe deterioration and substrate damage as restoration work rather than ordinary repaint prep, which is useful to know if you uncover rot.
Some people add a mold-resistant primer afterward. Products like Zinsser's mold-killing primer are sold for this, and the manufacturer lists it as EPA registered, but that's the maker's claim. Read the label, and treat the primer as a supplement to proper cleaning, never a substitute.
When to Stop DIY and Call a Pro
A weekend with a sprayer and a brush handles a small, surface-level patch on sound siding. Past that, it's worth making a call. Watch for these signs:
- Growth covers large areas, or returns within one season after you've treated it.
- Wood feels soft, spongy or crumbles under a screwdriver. That's rot, and cleaning won't fix it.
- Mold is concentrated around windows, under gutters or at roof lines, which often points to a leak or drainage problem that has to be solved first.
- Old paint is peeling, bubbling or failing in sheets.
- The house is two stories or more, and you'd be working from a ladder with a wet brush and a sprayer.
- You have health concerns, such as asthma, allergies or a weakened immune system.
Calling a pro doesn't mean the job gets out of hand. A good painting contractor reads the wall, finds why the growth keeps coming back and puts the cleaning, repair and painting in the right order. Our exterior cleaning and exterior painting crews handle that sequence across Snohomish County and North King County. Spot repairs to damaged trim and siding are part of the same process, and if the damage runs deeper than the surface, we'll tell you plainly rather than paint over it.
What a Written Scope Should Include
If you hire someone, don't settle for a one-line quote that says "wash and paint." A written scope protects you, and it's how you compare bids honestly. It should spell out:
- The cleaning method. Which cleaner (a bleach mix or an anti-microbial product), how it's applied, and whether pressure or hand-scrubbing is used.
- The PCA P14 level. Which of the four prep levels the quote is based on, so you know exactly how much scraping, sanding, caulking and spot-priming is included. Our PCA P14 explainer walks through the differences.
- Repair allowances. How soft or rotted wood will be handled, who decides, and how any change in cost is communicated before the work happens.
- Drying and timing. How the crew will confirm the surface is dry before priming or painting, and what happens if weather delays the work.
- Products. The primer and paint named by line, plus any mold-resistant additive or primer, so you can read the label yourself.
- Protection and cleanup. How plants, windows and walkways are covered, and how runoff and waste are handled.
- Exclusions. What isn't covered, such as roof or gutter work, and what happens if a hidden leak turns up.
A scope like this is why a bid built on square footage alone can mislead you. Two prices for the same house can hide very different amounts of prep. If you'd like a scope written out line by line, request an estimate and we'll walk the property, name the prep level and put every item in writing.